How to Underline Text in Illustrator: A Step-by-Step Guide
Adobe Illustrator is a powerful tool for creating graphic designs, including the manipulation and formatting of text. One of the basic yet important text formatting options is underlining text. Underlining can help emphasize text, denote titles, or allow for better visual organization in a design. Understanding how to underline text within Illustrator is fundamental for designers looking to utilize all aspects of the software to enhance their projects.

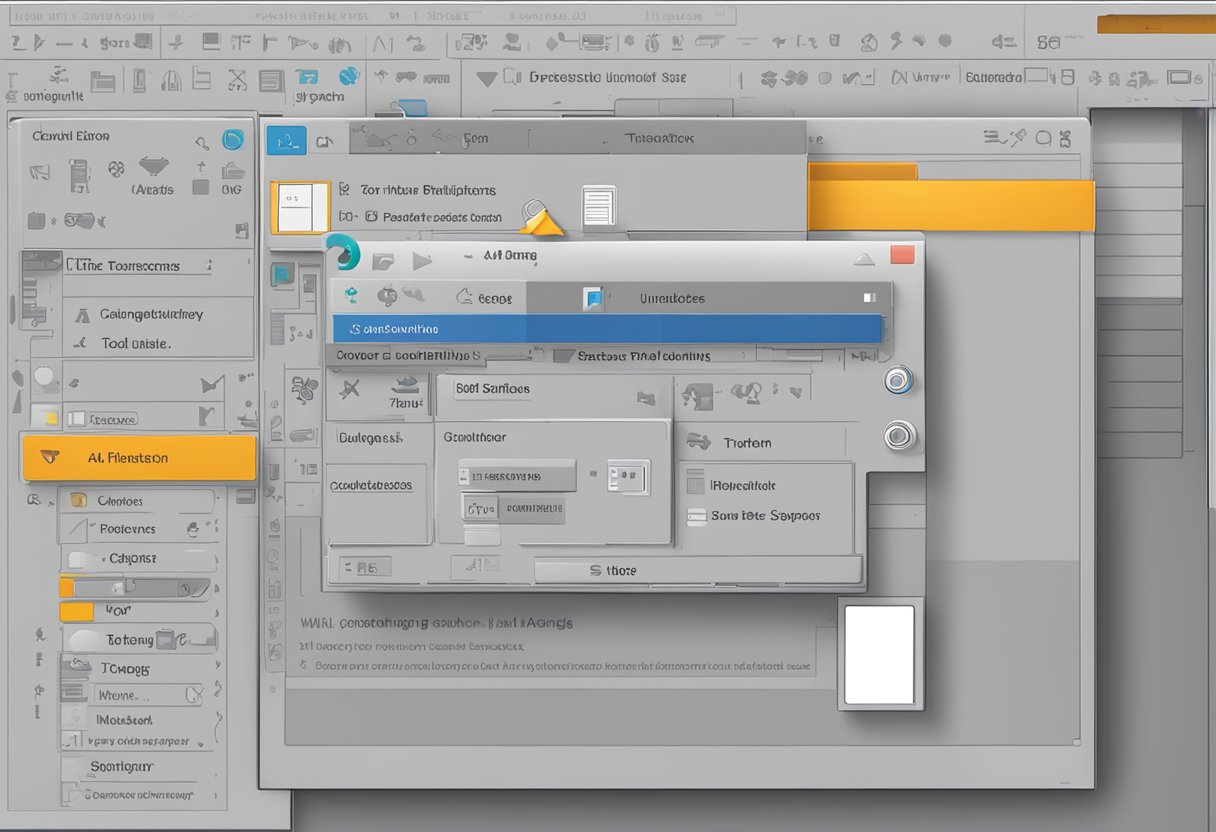
While the underlining feature may not be immediately visible in the Adobe Illustrator interface, it becomes accessible through a few simple steps. Utilizing the Character panel or the use of specific tools like the Line Segment Tool, users can apply and customize underlines to meet their design needs. Advanced techniques, such as modifying the weight and color of the underline, provide additional control over how the text interacts with the overall design. Adobe Illustrator also offers keyboard shortcuts that can help streamline the text underlining process, making it more efficient for frequent use.
Key Takeaways
- Underlining text in Illustrator can emphasize parts of your design.
- Accessing the underline feature requires using the Character panel or the Line Segment Tool.
- Customization options for underlines include altering their weight and color.
Understanding the Basics of Text in Illustrator

Before one dives into advanced techniques in Adobe Illustrator, it's essential to grasp the fundamentals of text manipulation within the software. This involves mastering the Type Tool, deciphering the complexities of the Character Panel, navigating the Toolbar with precision, and recognizing the nuances of text formatting options.
The Role of the Type Tool
The Type Tool is central to text creation in Illustrator; it's the primary means by which users add and edit text. By selecting the Type Tool (keyboard shortcut "T"), one can click on the artboard to create point text or click and drag to create area text, which flows within the bounds of a shape.
Exploring the Character Panel
The Character Panel is where typographic adjustments are made. It holds the keys to modifying font styles, size, leading, kerning, and tracking, among other settings. One can access the Character Panel by navigating to Window > Type > Character or by pressing Ctrl+T. This panel empowers the designer to fine-tune text to their exact stylistic preferences.
Navigating the Toolbar
Illustrator's Toolbar contains tools essential for text manipulation, including the Type Tool and Type on a Path Tool. It's the go-to location for selecting text-related functionalities fast. Familiarity with the Toolbar streamlines the design process and enhances efficiency.
Understanding Text Formatting
Text formatting within Illustrator is extensive, offering a range of options to adjust typography for both aesthetic and functional purposes. Formatting controls are found in the Character Panel and include adjustments for line spacing (leading), letter spacing (tracking and kerning), and horizontal and vertical scaling. One's ability to employ these adjustments determines the readability and visual appeal of the text within a design.
By understanding these key components—Type Tool, Character Panel, Toolbar, and text formatting techniques—designers ensure that text elements in Illustrator not only convey the intended message but also contribute to the overall design's impact.
Getting Started with Underlining Text
Underlining text in Adobe Illustrator is a straightforward process that involves selecting the desired text with the appropriate tool and then utilizing the underline feature. This simple action can emphasize key elements of your design.
Selecting Text with the Selection Tool
To begin, one should select the text they wish to underline. The Selection Tool (often represented by a black arrow or the shortcut "V" on the keyboard) allows for the manipulation of objects. For text, it's more efficient to use the Type Tool (shortcut "T") to highlight the specific text that needs underlining.
Using the Underline Text Feature
Once the text has been selected, underlining can be accomplished in a few clicks. Look for the Underline icon in the Character panel—if it's not visible, one might need to show options from the panel's fly-out menu. Alternatively, one can use a shortcut to activate the underline feature, which will instantly apply a standard underline beneath the selected text. For those who need bold text alongside the underline, this can be done in the same Character panel by clicking the bold style option.
Advanced Underlining Techniques
When working with Adobe Illustrator, an artist has the flexibility to go beyond the basics of text underlining. By utilizing Illustrator's array of tools, one can create underlines with customized strokes, weights, and colors to add a professional or creative touch to their text.
Drawing Custom Underlines
To draw a custom underline, they may use the Pen Tool or the Line Tool. The Pen Tool allows for the creation of intricate and custom-shaped lines that follow any desired path under the text. Here’s a simple way to do it:
- Select the Pen Tool from the toolbar.
- Click to create the starting point on the canvas.
- Click to create additional points, and drag to bend and shape the line.
- Close the path if necessary for a full custom underline.
Alternatively, for a straight underline, they can use the Line Tool:
- Choose the Line Tool from the toolbar.
- Click and drag on the canvas to draw a straight line.
- Hold Shift while dragging to snap the line to a perfect horizontal direction.
Applying Stroke and Color
Once the underline is in place, they can adjust the stroke weight to control the thickness and apply a stroke color to match or contrast the text. To modify these properties:
- With the underline selected, go to the Stroke Panel.
- Adjust the Stroke Weight to increase or decrease the line thickness.
- Click on Stroke Color to choose a new hue.
For a more distinct look, they might apply a border stroke to their underline:
- In the Stroke Panel, choose 'Dashed Line' to create a patterned stroke.
- Use the corner widget to round the ends for a smoother appearance.
By adjusting these settings, they can ensure their text stands out with a unique, custom underline that enhances design appeal.
Streamlining Work with Keyboard Shortcuts
When working in Adobe Illustrator, utilizing keyboard shortcuts can greatly enhance efficiency, particularly when formatting text. One essential shortcut to remember is for underlining text, which is a common task for designers.
The Illustrator underline text shortcut is a simple combination that involves the Type tool and a specific key command. Users first need to select the Type tool by pressing the T key. Then, they highlight the text segment they wish to underline. To apply the underline, pressing Control-T (or Command-T on a Mac) will open the Character panel.
Here's a quick guide to streamline text underlining:
- Equip Type Tool: Press T
- Highlight Text: Click and drag over desired text
- Underline Text: Press Control-T, then click Underline option
Additionally, they can increase workflow efficiency by incorporating other helpful keyboard shortcuts for various text formatting options within Illustrator. Remembering and applying these shortcuts ensures a more fluid design experience, reducing the reliance on menu navigation and thus, saving time.
| Action | Shortcut |
|---|---|
| Open Character Panel | Control-T |
| Underline Selected Text | After Control-T, click underline |
| Toggle between Selection Tools | Press V |
Incorporating these shortcuts into one's routine allows for a more streamlined workflow, maintaining focus on the creative process rather than on manual formatting. They are designed to be intuitive and keep the designer's hands on the keyboard, which can lead to a more concentrated and effective work mode.
Enhancing Design with Underlines
Underlining text in Adobe Illustrator can add emphasis and style to a design. Whether one is creating logos, illustrations, or text elements, applying underlines can enhance the visual appeal and contribute to a design's overall hierarchy.
Adding Creative Underline Styles
Designers can apply a variety of underline styles to their text to create distinct visual effects. The basic underline can be transformed by adjusting its weight, color, and distance from the text. Illustrator allows for custom underlines created with paths or line segments that can follow the contours of letters for a more dynamic appearance. Experimenting with dashed, wavy, or patterned lines adds creativity to underlines beneath text.
Working with Different Shapes and Graphics
Using shapes such as rectangles or custom graphics as underlines can introduce a new layer of design. Graphic designers often utilize the Pen Tool to craft unique paths that serve as underlines, integrating seamlessly with logos and illustrations. These custom shapes and graphics can act as underlines that carry a part of the design's theme or message, enhancing the visual narrative within a composition.
By effectively incorporating underlines, designers are able to add depth and flair to their typographic projects in Illustrator, ensuring text elements are not only readable but also aesthetically pleasing.
Fine-Tuning Underline Properties
In Adobe Illustrator, users have the capability to adjust underline properties with precision, directly affecting the visual weight and style of their text. This control is essential for designers who need their text to conform to specific branding guidelines or who want to achieve a particular aesthetic effect.
Adjusting Weight and Scale
To modify the weight of an underline, a user must access the Character Panel. Here, one can alter the thickness of the underline to make it more pronounced or subtle, depending on the desired outcome. The steps include:
- Select the text with the Type Tool (T).
- Open the Character Panel (Type > Character or Ctrl/Cmd + T).
- Click on the Underline button to activate it.
- To adjust the weight, Illustrator users can utilize the Swatches Panel to select a stroke weight or create a new style.
Adjusting the underline's scale is also possible and refers to the width of the underline relative to the text. Increasing the scale will extend the underline beyond the text boundaries, while decreasing it will contain the underline strictly under the text. Control over this property is essential for maintaining a cohesive design.
Manipulating Anchor Points and Paths
Users may choose to create a more customized underline by manipulating anchor points and paths:
- Use the Direct Selection Tool (A) to select the underline's anchor points.
- Adjust the points to alter the path of the underline, enabling the creation of underlines with unique shapes and contours.
- For an advanced adjustment, applying an offset path can provide additional control over the underline’s position relative to the text.
This method caters to designs which require a custom offset or when the underline must flow organically with certain typefaces or design elements. Such adjustments should be made with care, as they can drastically change the look and readability of the text.
Integrating Illustrator with Other Adobe Tools

Adobe Illustrator excels in vector graphic design, but its true power is unlocked when used in conjunction with other Adobe tools. Seamless import and export features, along with asset integration capabilities, provide a cohesive experience across different creative platforms.
Importing and Exporting Between Photoshop and Illustrator
Illustrator and Photoshop comprise a dynamic duo within the design workflow. To import Photoshop files into Illustrator, users can simply choose File > Open and select the PSD file. They also have the option to import layers as objects to maintain the original structure and facilitate easy editing.
When exporting from Illustrator to Photoshop, users should select File > Export and choose 'Photoshop (PSD)' as the file format. This preserves the ability to manipulate individual layers in Photoshop, ensuring edits can be finely tuned. Supported file formats for export include AI, EPS, and PDF, among others, aligning with various project requirements.
- To Import from Photoshop: File > Open > choose ".psd"
- To Export to Photoshop: File > Export > select 'Photoshop (PSD)'
Leveraging Assets from Envato Elements
Envato Elements houses a vast repository of creative assets that Illustrator users can harness to enhance their projects. To incorporate these assets, users should download the desired elements from the Envato Elements website and save them in a compatible file format such as EPS or AI. They can then import these files into Illustrator using the File > Open command.
By embedding resources from Envato Elements directly into Illustrator projects, designers enrich their artwork with a professional flair. It streamlines the design process and provides access to a broad spectrum of high-quality graphics and templates that are ready to use or customize.
- To Use Envato Elements:
- Download assets as EPS or AI files.
- Use File > Open in Illustrator to import and integrate assets into your projects.
Optimizing the Underline Workflow
In Illustrator, streamlining the process of underlining text involves customization of the Appearance Panel and efficient management of Artboards to ensure a seamless workflow.
Customizing the Appearance Panel
The Appearance Panel in Illustrator is a powerful tool for enhancing text elements, including underlines. Users can add multiple strokes and effects to the underline to change its appearance. For instance, one can make an underline thicker by adding a new stroke and adjusting its weight; the panel allows fine control over the underline's position and opacity, extremely useful for professional projects that require a high level of detail.
Creating and Managing Artboards
Efficiently managing Artboards is crucial for Illustrator users working with multiple projects simultaneously. Utilizing the Artboard tool, designers can create various artboards within a single document. This approach simplifies the management of different design elements, such as underlined text, across various project stages. Moreover, the user can employ the Line Segment Tool to manually draw precise underlines, ensuring consistency across different artboards.
Mastering Text Effects
Adobe Illustrator offers robust features to create diverse and dynamic text effects, which can greatly enhance graphic designs. Mastery in manipulating text goes beyond simple techniques and requires an understanding of advanced tools such as "Type on a Path" and "Text Area."
Exploring Type on a Path
Type on a Path allows designers to place text along the perimeter of a shape or line, resulting in creative and visually appealing effects. To start:
- Select the Text Tool (T).
- Click on a path, which can be a circle, arc, or even a custom star-shaped vector.
- Type the desired text and adjust the position with the Direct Selection Tool (A).
- Note how the points of control help align the text precisely to the path.
By experimenting with different paths, one can wrap text in various shapes which adhere to pre-designed layouts.
Experimenting with Text Area and Lines
Managing larger blocks of text requires a Text Area, which Illustrator treats as a bounded environment.
- Use the Text Tool (T) to click and drag a rectangle where the text should flow.
- Input the text; Illustrator automatically wraps it within the created bounds.
For those needing more line-specific control:
- The Line Segment Tool () creates straight lines that serve as baselines for text.
- By holding Shift, one ensures the lines are perfectly horizontal or vertical, which is crucial for alignment consistency.
These features give designers the flexibility to define text areas for paragraphs while precisely controlling individual lines, vital for high-quality typographic work.
Understanding Object Editing Techniques
In the realm of Adobe Illustrator, mastering object editing techniques is essential for precise design manipulation. These methods allow the user to refine and alter vector objects with accuracy.
Using the Direct Selection Tool
The Direct Selection Tool in Illustrator is a powerful feature for editing individual points or segments of an object. With this tool, designers can click on a point or path to adjust its position or shape directly. For instance, after drawing a shape, one can use the Direct Selection Tool to move anchor points, thus altering the geometry of the object. It's a precise method to fine-tune an object's attributes without affecting the entire design.
Illustrator's Expand Functionality
When it comes to altering object properties extensively, Illustrator's Expand functionality becomes indispensable. By selecting an object and choosing Object > Expand, a user can convert strokes into shapes, making it possible to edit every aspect of the stroke’s appearance. This is particularly helpful when designers want to customize the outlines of text or other stroked objects, such as underlining or changing the stroke width and style. Once expanded, these previously uneditable strokes turn into fully editable shapes, providing extensive creative control over the object’s final look.
Additional Formatting Options

Adobe Illustrator provides users with a robust set of text formatting tools that extend beyond the basic underlining feature. These additional options allow for impressive typographic manipulation, thus enhancing the visual impact of text elements within a design.
Incorporating Bold and Strikethrough
Bold: To make text bold in Illustrator, one selects the text and either uses a keyboard shortcut or changes the font style in the Character panel, if the font includes bold styling.
Strikethrough: Adding a strikethrough effect involves more steps, as there is no default strikethrough option. Designers often create a line with the Line Segment Tool (\) and manually align it through the text.
Adjusting Fill Color and Stroke Options
Fill Color: Changing the fill color of text can be done by selecting the text and clicking the Fill Color in the Tools panel or the Color panel. Users can choose any color from the palette or use a specific color code for consistency.
Stroke Option: To apply a stroke to text, one selects the text and adjusts the stroke color and weight using the Stroke panel. Various stroke properties including the width, cap, and join can be altered, giving designers the flexibility to create unique text effects.
Illustrator's comprehensive palette of formatting options empowers designers to create rich, visually dynamic text that can complement the overall design of their projects.
Exploring Creative Tools and Techniques
Adobe Illustrator offers a robust set of tools for artists and designers to add emphasis to text. When it comes to underlining text, users can explore beyond the standard options to create more custom and creative effects.
Drawing with the Pen and Brushes
When users are looking to create custom underlines, Illustrator's Pen tool becomes a critical asset. This tool allows for precise control over the shape and the path of the underline, making it possible to design unique underlines that follow the contours of letters or add artistic flourishes. Here's a quick guide for employing the Pen tool in this context:
- Select the Pen tool from the toolbar.
- Click on the artboard to set anchor points that define the path of the underline.
- Adjust the handles of these points to create curves and angles.
To enhance these lines, users can utilize Illustrator's array of Brushes:
- Apply a brush to the path by selecting it from the Brushes panel.
- Adjust stroke width and brush definition to personalize the underline's appearance.
Combining the Pen tool’s precision with the artistic styles of Brushes can result in visually appealing and tailored underlines that can make text elements stand out in a vector graphic.
Using the Paintbrush and Eyedropper
Illustrator's Paintbrush tool is another instrument used for drawing that simulates hand-drawn lines with a more dynamic feel than the Pen tool. This can be particularly useful for underlining with a more organic look or when trying to emulate calligraphy or hand-painting. To use the Paintbrush tool:
- Click on the Paintbrush tool or press B.
- Draw a freehand line beneath the text to serve as the underline.
- Alter brush options to modify thickness, opacity, and style.
The Eyedropper tool is then employed to sample colors from other elements within the design, ensuring the underline color complements other components. Users can:
- Select the Eyedropper tool or hit I.
- Click on an object to copy its fill, stroke, or both to the underline.
This combination of tools promotes a workflow that is both artistic and efficient, empowering users to craft underlines with a painterly quality that blends seamlessly into their overall design.
Troubleshooting Common Issues
When working with underline text in Illustrator, designers may encounter a range of issues that can impact the outcome of their work. This section addresses common problems and offers solutions to ensure underlined text is presented as intended.
Addressing Underline Text Shortcomings
If underlined text seems to disappear when the text is outlined, it might be a software-specific issue. Users have reported such problems, particularly when updating Illustrator. To resolve this, graphic designers can first ensure they are using the most up-to-date version of the software. If the problem persists, they might need to manually add the underline after outlining the text by using the line tool or pen tool. For more details, visiting forums like the Adobe community can offer additional insights and solutions provided by other users who encountered similar problems.
Solving Formatting and Design Problems
Designers may sometimes struggle with the thickness or spacing of an underline or experience trouble finding the underline option. Illustrated steps provided by resources such as Layerform Design Co can guide through the process of customizing underline properties.
- Adjusting Underline Thickness:
- Select the text with the Type Tool (T).
- In the Character panel, set the underline options to customize thickness.
- Changing Underline Spacing:
- Access the Character panel's fly-out menu.
- Adjust the Offset value to change the spacing between text and underline.
For beginners and experienced graphic designers alike, understanding the control available within the Character panel can greatly improve their formatting abilities. It's important to always double-check settings to prevent common issues related to underlining text in Illustrator.
Managing Illustrator Documents and Assets

Effective management of documents and assets in Adobe Illustrator ensures a smoother workflow. It involves understanding how to work with files and harness the capabilities of the Properties and Swatches panels to enhance one's project.
Working with Files and Formats
In Adobe Illustrator, one can work with a variety of file formats to suit different project needs. Commonly used formats include the native .ai for Illustrator documents, .eps for compatibility with other vector applications, and .pdf for easy sharing and printing.
- Documents: Create new Illustrator documents to add text, vector shapes, and images.
- Projects: Organize individual files into overarching projects.
Here is a reference table for management actions on different file types:
| File Action | .ai |
.eps |
.pdf |
|---|---|---|---|
| Editability | ✓ | ✓ | ✓ |
| Compatibility | ✓ | ✓ | ✓ |
| Best for Printing | ✓ | ✓ | ✓ |
| Web Preview Available | ✕ | ✕ | ✓ |
Utilizing the Properties Panel and Swatches
The Properties Panel in Illustrator is a powerful tool that allows for the quick modification of document and asset attributes. The user can access options for the selected element, streamlining the design process.
- Properties Panel: Modify stroke, fill, opacity, and other attributes of selected objects.
- Swatches Panel: Apply predefined or custom colors, patterns, and gradients to text and objects within the document.
In managing assets, the Swatches Panel plays an integral role:
- Apply a color: Select an object and click a swatch to apply that color.
- Create a new swatch: From the Swatches Panel menu, choose "New Swatch," then define the color.
Both panels are instrumental in effective asset management, providing users with quick access to essential editing tools that greatly enhance productivity in Illustrator.
Utilizing Illustrator in Professional Projects
Adobe Illustrator is an indispensable tool for graphic designers who are tasked with creating and managing various visual assets for professional projects. It offers precision and versatility in design, especially when dealing with vector graphics.
Designing Logos and Brand Assets
Graphic designers often rely on Illustrator to develop logos and brand assets due to its robust vector capabilities, which ensure that designs are scalable without loss of quality. When designing a logo, they can use Illustrator's comprehensive toolset to manipulate shapes, text, and colors with precision. Designers might begin with a basic sketch before moving into Illustrator to refine their concepts. Envato Elements offers a plethora of Illustrator templates and resources that can jump-start the design process and inspire creativity.
For brand assets, consistency across different media is key, making Illustrator a go-to choice. It allows for the creation of a cohesive visual identity by ensuring that colors and styles match across various items such as business cards, letterheads, and other branded materials.
Creating Illustrations for Web and Print
Illustrator excels at generating illustrations for both web and print due to its vector nature. Web designers leverage Illustrator to create icons and graphics that are perfectly rendered on all screen sizes. Elements like buttons or banners designed in Illustrator can easily be exported for web use, maintaining clarity and sharpness on any device.
For print projects, Illustrator provides the tools necessary to configure artworks with the required bleed, crop marks, and color settings. Whether it's for magazine illustrations, posters, or packaging, Illustrator enables designers to set up their documents to exact specifications for high-quality print outputs.
Exploring Advanced Illustrator Features
In Adobe Illustrator, mastery over advanced features such as the fly-out menu and customizing preferences can significantly enhance one’s efficiency and creative control. These tools offer nuanced management of the workspace, ensuring tasks like underlining text can be executed with precision.
Understanding the Fly-Out Menu
The fly-out menu in Illustrator provides a plethora of options that are not immediately visible in the default panels. For example, accessing the Underline feature requires one to open the Character panel by going to Window > Type > Character or pressing Control-T. In the absence of the underline option in the main Character panel view, one would need to click on the fly-out menu—the small button in the top corner of the panel—to select Show Options, which reveals additional text formatting commands.
Customizing Preferences for Better Control
Customizing Illustrator’s preferences allows users to tailor the application to their specific workflow needs. These preferences can be reached via Edit > Preferences and cover an extensive range of settings from general appearance to the functionality of tools. For instance, setting a custom workspace, adjusting keyboard shortcuts, or changing the default settings for the star tool can streamline one's design process. When each feature is configured to one's liking, the control over projects is significantly enhanced, leading to a more efficient and personalized Illustrator experience.
Developing Efficient Illustrator Techniques
Developing proficiency in Illustrator hinges on the use of tools that enable precision and agility. Mastering selection tools and shape tools like the line and rectangle are fundamental for effective design work.
Learning Selection and Direct Selection Tools
The Selection tool (V) is essential for moving entire objects, while the Direct Selection tool (A) allows for the manipulation of individual anchor points or paths. They are the foundational tools every Illustrator user should understand to efficiently select and adjust elements within their artwork.
- Selection Tool Usage
- Shortcut: V
- Use: Click or drag to select whole objects
Direct Selection Tool Usage
- Shortcut: A
- Use: Click on anchor points or drag to select paths
Illustrator empowers users to toggle between these tools quickly using keyboard shortcuts, enhancing the workflow and allowing for rapid modifications.
Mastering the Line and Rectangle Tools
The Line Tool creates straight lines, which can be essential for defining boundaries, creating grids, or simply adding detail. It is a straightforward tool that requires one to click and drag on the canvas to draw a perfect line.
- Line Tool
- Shortcut: \ (backslash)
- Click and drag to draw lines
- Hold Shift to constrain angles to 45 degrees
The Rectangle Tool (M) is another fundamental tool used to draw squares and rectangles, which can form the basis for complex shapes or be used in layout design.
- Rectangle Tool Techniques
- Shortcut: M
- Click and drag to create rectangles
- Hold Shift for squares
- Use Alt (Option on Mac) to draw from the center
A mastery of these shape tools is vital for vector illustration, enabling one to create intricate designs with geometric precision. Familiarity with these tools streamlines the design process, ensuring that one can construct the desired shapes with ease and efficiency.
Typography and Text Management in Illustrator
Mastering typography and text management in Illustrator allows designers to create precise and visually appealing text elements. Effective use of fonts and text areas is crucial for dynamic layouts and refined typographic designs.
Exploring Fonts and Text Styles
Illustrator provides access to a wide array of fonts which can be tailored to suit any design. Text styles are integral for branding and messaging, enabling designers to convey tone and emphasis.
- Sans Serif vs. Serif: Choose based on design context; sans serif for a clean, modern look, serif for tradition and readability.
- Weight and Italicization: Use bold for headings and italic to denote emphasis or quotes.
- Character Variations: Leverage ligatures, capitals, and letter spacing to enhance typographic quality.
Designers may refine their text by customizing attributes such as kerning, tracking, and leading, which affect the space between characters, words, and lines, respectively.
Using the Text Area for Complex Layouts
The Text Area in Illustrator is a powerful tool for managing complex layouts.
- To create a text area, select the Type Tool (T) and click & drag to define the field.
- Designers can link multiple text areas for continuous flow, ensuring consistency across columns and pages.
- Text formatting within these areas is crucial; always align text for optimal legibility and visual appeal.
Table: Management of Text Areas
| Function | Description |
|---|---|
| Text Flow | Links boxes to create continuous text across areas. |
| Alignment | Ensures text is evenly distributed within the area. |
| Text Wrap | Adjusts text around other elements, like images. |
For more detailed instructions on text management and to further explore text toolbox functionalities, check out guides like How to underline text in Illustrator.
Concluding Notes on Underlining Text
Underlining text in Adobe Illustrator is a straightforward process. A user can enhance their designs by utilizing this simple typographic function. Below are key takeaways for efficient underlining techniques in Illustrator:
- The Character Panel: To underline text, access the Character panel within Illustrator. This panel provides various text formatting options including the underline feature.
- Shortcuts: Familiarity with shortcuts can greatly expedite the design process. For example, pressing
Ctrl+T(Windows) orCmd+T(Mac) opens the Character panel right away. - Thickness Adjustment: Customizing the thickness of the underline is feasible by altering the stroke weight. This gives designers the freedom to match the underline with the visual weight of the font used.
- Positioning: Careful consideration should be given to the position of the underline to ensure it does not interfere with descenders or the legibility of the text.
- Alternative Methods: The underline tool is not the only method. Other tools like the Pen Tool or the Line Segment Tool offer more customized underlines but require additional steps.
In essence, Adobe Illustrator caters to various needs when it comes to underlining text, from basic underlines to more bespoke requirements. Mastery of these techniques is crucial for designers looking to elevate their typographic work within Illustrator.
Frequently Asked Questions
The section explores common inquiries about underlining text in Adobe Illustrator, offering straightforward guidance on procedures, adjustments, shortcuts, and utilization across devices.
What is the procedure for adding an underline to text in Adobe Illustrator?
To add an underline to text in Adobe Illustrator, one selects the text using the Type Tool and then clicks on the "Underline" option in the Character Panel, effectively underlining the selected text.
Can the thickness of an underline be adjusted in Illustrator, and if so, how?
Adjusting the thickness of an underline in Illustrator can be done by accessing the Stroke options, where one can modify the weight to make the underline thicker or thinner.
Is there a keyboard shortcut to quickly underline text in Illustrator?
Illustrator does not have a dedicated keyboard shortcut for underlining text by default, but users have the option to create a custom shortcut through the Edit > Keyboard Shortcuts menu.
Are there any new features for underlining text in the latest version of Illustrator?
Adobe Illustrator's updates may include enhanced typography features, including underlining; users should check the latest release notes for any new underlining capabilities.
What steps should I follow to underline text within Illustrator on a mobile device?
To underline text in Illustrator on a mobile device, one must use the Touch Type Tool to select the text and then choose the underline option from the Character menu, as the workflow is similar to the desktop version.
How can underlining be achieved in Illustrator on an iPhone?
On an iPhone, underlining text in Illustrator is accomplished through the Illustrator on the iPad app, using the same method as on other mobile devices—select the text and then apply the underline attribute from the Character settings.